

Do you dread facing that tired, old sink every morning? Say goodbye to pesky leaks and clogs, and greet your shiny new sink with open arms!
Want to do it yourself and feel like a pro? All you need are a few tools and some tips. You’ll have your very own bathroom oasis in no time. Let’s get started by embracing the new and waving farewell to the old sink!
How to Replace a Bathroom Sink

Gather Your Tools
Replacing a bathroom sink can be a fun and easy DIY project for you! Just make sure you’re ready with all the necessary tools:

Adjustable wrench
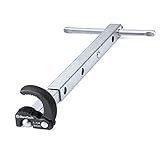
Basin wrench

Bucket

Channel locks

Hacksaw

Putty knife
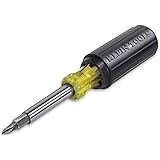
Screwdriver

Silicone caulk

Towel
We know, we know, that’s a lot of stuff. But trust us, and it’s better to be prepared than to halt the process halfway through because you’re missing a tool. Moreover, with all the tools, you’ll feel like a born handyman or handywoman.
Steps to follow
Why settle for a mundane sink when you can upgrade it to something amazing? With the right tools and a bit of know-how, you can transform your sink into a work of art in a few hours. Follow this guide, and let’s make it happen.
Step 1: Disconnect the water supply
Plumbing work can be quite a chore, but you need to turn off the water before you get your hands dirty. To do it, turn the shut-off valve under the sink clockwise. After that, a wrench should make easy work of disconnecting the faucet’s water supply lines.
Step 2: Remove the existing sink
All right, time to get that old sink out! Start by giving the mounting nuts underneath the sink a good loosener with your trusty wrench. With the nuts loosened, enlist your bestie or a family member to help you wrangle that pesky sink off the mounting bracket. It’s heavy and could give you a bit of trouble on your lonesome, so it’s more fun (and safe!) with some company.
Step 3: Measure and install a new sink
First things first, get those dimensions of the existing sink correct and use them to buy the new sink. Got it? Great! Now, put the new sink in its place on the mounting bracket and make sure it doesn’t wobble by securing it with some nuts, tightening them till the sink’s steady as a rock.
Step 4: Install the faucet
Take your shiny new faucet and mount it onto the sink, following the manufacturer’s instructions carefully. Don’t forget to tighten up those mounting nuts or screws to keep your faucet nice and steady. With the faucet securely in place, next up is connecting the water supply lines. Tighten them up using a trusty wrench, and you’re ready to get that water flowing.
Step 5: Connect plumbing components
Start by connecting the plumbing components under the sink and securing the drain pipe to the sink with a wrench. Be sure to check for any leaks or drips once the plumbing is connected. With the right tools and a little patience, replacing a bathroom sink isn’t as daunting as it may seem. You’ve got this.
Test the New Sink
Here are the main points to keep in mind when testing a new bathroom sink:
- Turn on the water supply valves located under the sink
- Check for leaks around the sink, faucet, drain, and water supply connections
- Tighten any loose connections and test the sink again
- Check for any signs of water damage or moisture under the sink
By following these steps, you can ensure that your new bathroom sink is functioning properly and avoid any potential issues in the future.
Frequently Asked Questions
Do I need to hire a professional to replace my sink?
Not necessarily. Replacing a sink isn’t the most complicated task, and with some patience and the right tools, you can easily do it yourself. However, if you are inexperienced or don’t feel confident in your abilities, it’s always best to hire a professional.
Can I reuse my old faucet with a new sink?
Yes, you can reuse your old faucet as long as it fits the new sink. If not, then you will need to purchase a new one. Just make sure that the connections are compatible before installing it.
How long does it take to replace a bathroom sink?
The time it takes to replace a bathroom sink depends on a few factors, such as the complexity of the installation and the type of sink being installed. On average, it can take anywhere from 1-3 hours.
What type of sink should I choose?
There are many types of sinks to choose from, including pedestal, wall-mounted, and undermount. It’s important to choose a sink that fits your style and budget, as well as one that is the right size for your bathroom.
Do I need to turn off the water supply before replacing the sink?
It is crucial to turn off both the water supply and power supply to any nearby electrical outlets when replacing the sink to prevent water damage and ensure safety.
Conclusion
To replace your bathroom sink without any future problems, follow these steps carefully. Make sure you have the necessary tools and take safety precautions. If necessary, seek assistance from an expert. With some patience and effort, you can successfully install your new sink.
If you liked this article about how to replace a bathroom sink, consider checking out these other articles below —
