

Picture this: you’re standing in the shower, singing your heart out, when suddenly you notice your trusty handheld showerhead isn’t performing like it used to. The water pressure is a mere trickle, and let’s face it, your rendition of “Bohemian Rhapsody” deserves better.
But fear not, my fellow shower rockstars – taking apart and reviving your handheld showerhead is easier than hitting that high note. And don’t worry. We’ll keep the process fun and lighthearted so you can get back to belting out your favorite tunes in no time. So grab your tools, and let’s turn your bathroom into a backstage workshop!
When Would You Want To Take Your Handheld Shower Head Apart?

So, why would you need to take apart a handheld showerhead in the first place? Well, over time, mineral buildup and other debris can accumulate inside the showerhead, leading to decreased water pressure and even clogs. Taking apart your showerhead allows you to clean or replace any parts that may be causing these issues. Plus, it’s a great way to flex those DIY muscles.
Tools and Materials
Before we get started, here’s a list of tools you’ll need to take apart a handheld showerhead:

Adjustable pliers
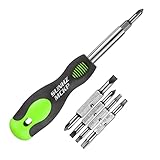
Screwdriver (flathead or Phillips)
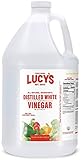
White vinegar

Old toothbrush
Yep, that’s it! You probably already have most (if not all) of these items lying around your house.
How to Take Apart a Handheld Showerhead
Step 1: The Pre-Showerhead Surgery Checklist
Before diving into the disassembly process, ensure you’re prepared. Turn off the water supply to your shower to avoid any unexpected waterworks. Gather your tools, including adjustable pliers, a screwdriver (flathead or Phillips), white vinegar, and an old toothbrush.
Step 2: Unscrewing Your Showerhead Sidekick
Time to temporarily part ways with your handheld showerhead. Using adjustable pliers, unscrew the showerhead from the hose. Remember to grip it firmly yet gently – we’re fixing it, not wrestling with it.
Step 3: Unveiling the Showerhead’s Secrets
Now that the showerhead is separated from the hose let’s investigate further. Grab your trusty screwdriver (flathead or Phillips) and remove any screws or caps holding it together. Gently pull apart the showerhead, taking care not to damage its hidden treasures (a.k.a. internal parts).
Step 4: The Great Showerhead Soak
Give your showerhead a relaxing bath by soaking it in white vinegar for about an hour. This helps dissolve mineral buildup and debris. Take this time for a coffee break or practice your shower karaoke skills.
Step 5: Scrub-a-Dub-Dub, Showerhead in a Tub
After the soak, use an old toothbrush to scrub away any remaining buildup or debris gently. Rinse the showerhead thoroughly with water to wash away the evidence.
Step 6: Reassembling Your Trusty Shower Companion
With your showerhead squeaky clean, put it back together by following the disassembly steps in reverse order. Ensure everything fits snugly and securely.
Step 7: The Glorious Reunion
Reattach the showerhead to the hose using adjustable pliers. Once again, grip firmly but gently – we’re aiming for a happy reunion, not a wrestling match.
Step 8: The Moment of Truth
Turn the water supply back on and test out your newly refurbished showerhead. Bask in the glory of your successful DIY plumbing adventure and celebrate with a well-deserved shower concert!
Frequently Asked Questions
Can I take apart my showerhead without any tools?
Well, that depends on the type of showerhead you have. Some models have a twist-off mechanism that makes it simple to remove without tools.
On the other hand, other models may require a wrench or pliers to be used for loosening connections. As a best practice, we suggest reading the manufacturer’s instructions before attempting any disassembly.
What should I do if I can’t get the showerhead apart?
On the off chance that you have difficulty separating the showerhead, try using some pliers or a wrench to loosen the connections. If that fails, add some heat to the connections to loosen them up. A hairdryer or a heat gun can be helpful in warming up the connections before attempting to loosen them again.
How do I know if I need to replace my showerhead?
Here’s a useful tip if your showerhead it’s leaking, clogged, or giving you weak water pressure, then it’s probably time to swap it out. Or, you could always replace it with a fresher and more efficient model if you’re feeling fancy.
Can I clean my showerhead without taking it apart?
Yes, Just take a plastic bag, fill it with vinegar, and wrap it around the showerhead, securing it with a rubber band. Leave it there for a bit, take it off, and give the showerhead a gentle wipe with a soft cloth. Job done!
Do I need to use Teflon tape when reassembling my showerhead?
Absolutely! Without it, you’ll have more leaks than a broken dam. Simply wrap a few layers of Teflon tape around the threads of the showerhead and connect it securely to the hose. With this watertight bond, you’ll be singing in the shower in no time.
Conclusion
That’s it, folks! You’re now the proud owner of a fully restored showerhead. By getting your hands dirty, you’ve saved money and gained some serious plumbing skills. Put your pipes to the test, blast your tunes out loud, and feel that H2O love. Congrats on being a true DIY champion, and happy showering!
If you liked this article about how to take apart a handheld shower head, consider checking out these other articles below —
