

Wave goodbye to your bathroom blues with a sparkling new toilet seat! Swapping out your current seat is not rocket science and can be done in no time. Whether you need a new seat or want to give your current one a thorough cleanup, there are some easy-peasy steps you can follow. With the appropriate equipment and some patience, even inexperienced individuals can easily remove an old seat.
How to Remove Old Toilet Seat

Ready to switch out that old loo seat? Fear not! Armed with some basic tools and a smidge of patience, you’re ready to tackle this job. Here’s the lineup:
Tools You’ll Need
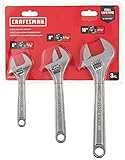
Adjustable wrench
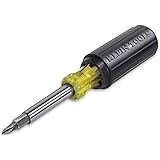
Screwdriver

Pliers

Razor blade or box cutter

Lubricant (optional)
Steps to follow:
Remove the Old Toilet Seat
Step 1: Inspect the Seat
Let’s start with inspecting the throne. Before you kick out the old toilet seat, give it a once-over for damage or wear and tear. Peek at the hinges, bolts, and screws, and make sure they aren’t rusted or corroded. And if they are, well, friends—it’s time to replace them!
Step 2: Loosen the Screws
Grab a trusty wrench and loosen those pesky screws holding the throne. Remember, lefty loosey to ease the nuts. Avoid being too rough, as we don’t want to break our beloved toilet.
Step 3: Remove the Old Seat
It’s time to loosen those screws and get your toilet seat in check! Grab that wrench and start turning counterclockwise to release those nuts. Remember to be gentle to avoid damaging your toilet and screws.
Step 4: Clean the Area
After disposing of the old seat, it’s time to get the throne area sparkling clean. Best to use a disinfectant cleaner and make sure there are no germs around. Clean the underside of the toilet seat as well before you toss it.
Install the New Toilet Seat
Step 1: Check the Fit
First things first, check the fit. Pop the new throne topper on the bowl, and make sure it lines up with the holes. If it doesn’t fit, fiddle with the hinges, or exchange it for a better size.
Step 2: Attach the New Seat
First, make sure the seat is the perfect size. If it is, it’s time to attach it. Insert those bolts through the holes in your toilet bowl, then place the hinges on top of the bolts. Use the nuts provided to hold it all together.
Step 3: Tighten the Screws
To secure the new seat, grab a wrench and tighten the nuts clockwise until they are snug. However, be careful not to over-tighten them and damage the toilet bowl.
Step 4: Test the Seat
Boom, you’ve installed your new throne! Now, pop a squat and make sure your new seat is solid. If it’s not wobbling or shifting around, you’re golden!
How to Preserve Your Toilet Seat
To maintain a toilet seat, make sure to clean it regularly with a damp cloth or disinfectant wipe. It’s important to avoid harsh chemicals that could harm the seat. Compared to a wobbly seat or accidents, tightening loose bolts with a screwdriver is much easier.
If you see any damage, make sure to replace the parts and keep your bathroom looking clean and tidy. Also, after cleaning the seat, make sure to keep it dry to avoid mold and mildew growth. These tips can keep your throne in perfect condition while keeping your bathroom clean and safe.
Frequently Asked Questions
Can a toilet seat be removed without tools?
Yes! In most cases, a toilet seat can be removed without any tools. Simply locate the two plastic caps at the back of the seat, pry them open with your fingers, and unscrew the nuts underneath with your hand. If the nuts are too tight, you can use a pair of pliers or a wrench to loosen them.
How do you remove a stubborn toilet seat?
To loosen stubborn nuts holding the seat in place, try using a penetrating oil like WD-40. Apply the oil to the nuts and let them sit for a few minutes before attempting to unscrew them. If that fails, use a hacksaw to cut through the bolts that hold the seat in place. Remember to wear gloves and eye protection while using a hacksaw.
What if the toilet seat is glued in place?
To remove a glued toilet seat, use a putty knife or scraper to lift it up gently. Use a hairdryer or heat gun to warm the glue and make it less sticky. Take caution while using the putty knife or scraper to prevent scratching the toilet bowl.
How often should a toilet seat be replaced?
To ensure safety and cleanliness, experts suggest replacing your toilet seat every 5-7 years. Don’t wait longer than that or until it becomes damaged or discolored. A loose and unstable seat can be dangerous, while germs and bacteria can accumulate on the seat’s surface, making it unsanitary.
Conclusion
Now that you know how to replace or tighten your toilet seat properly, it’s a good idea to regularly check for any signs of damage and sanitize the surface with disinfectant after every use. Keep these tips in mind, and you can enjoy a safe, clean, convenient throne!
If you liked this article about how to remove old toilet seat, consider checking out these other articles below —
